SSO with Duo
Introduction
This guide will take you through the steps required to perform BMS integration with Duo.
Creating BMS application in Duo
- Log into Duo.
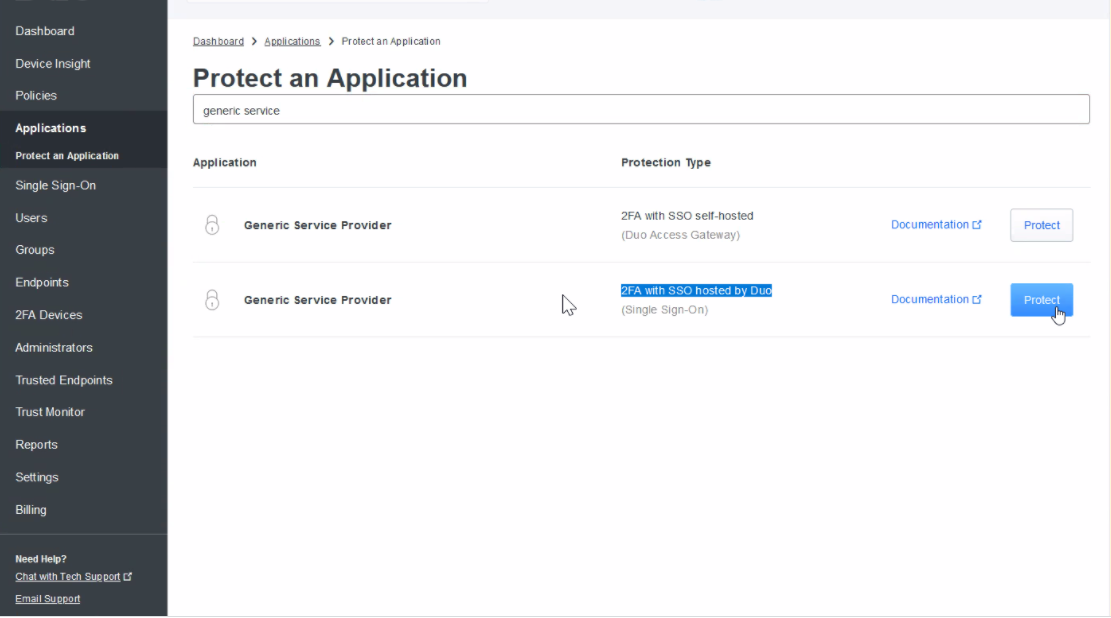
- Click Applications on the left panel. The Applications page will open, and you will see Protect an Application button on the top right.

- Click Protect an Application.
- In the Search field, enter generic service provider.
- From the search results, click Protect to select 2FA SSO Hosted by Duo.
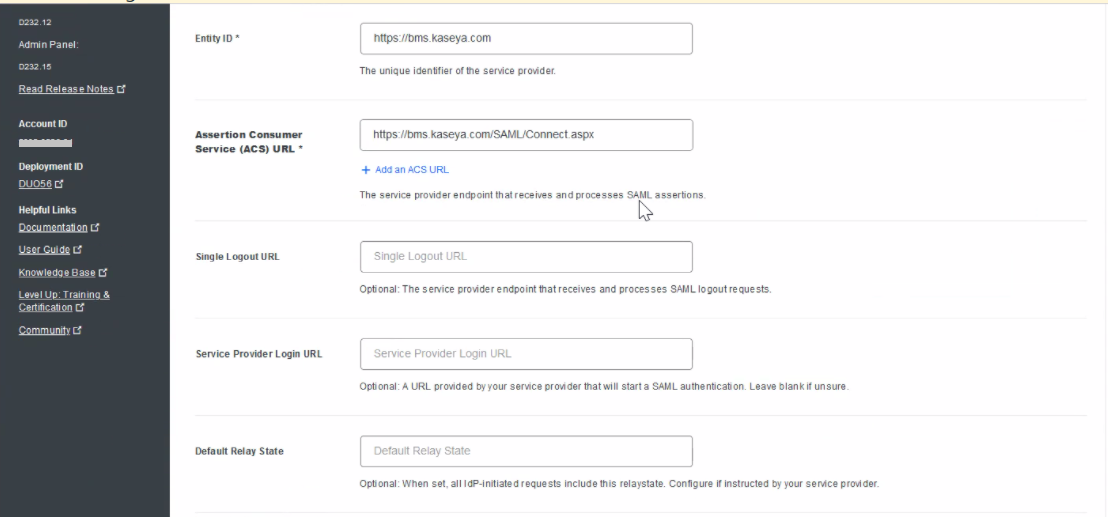
- Enter the following default settings in the respective fields for BMS/Vorex.
- Entity ID: Enter <server name>.
- Assertion Consumer Service (ACS) URL: This is the BMS URL. The format is <server name>/SAML/Connect.aspx.
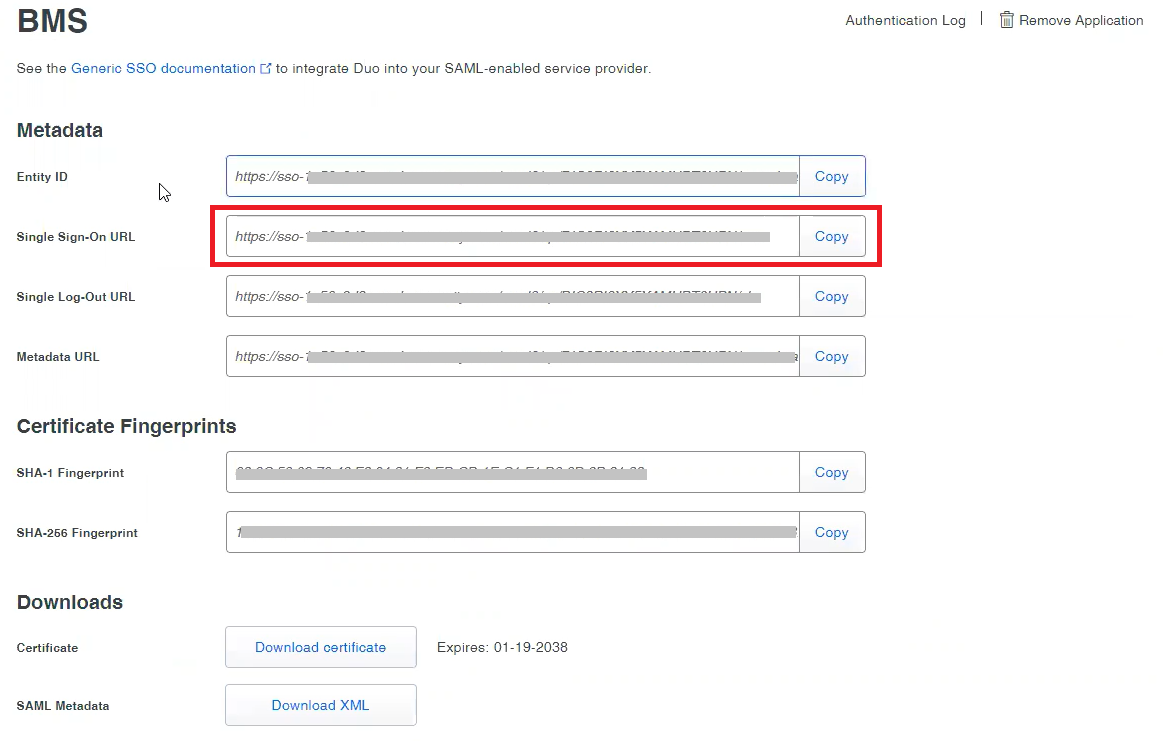
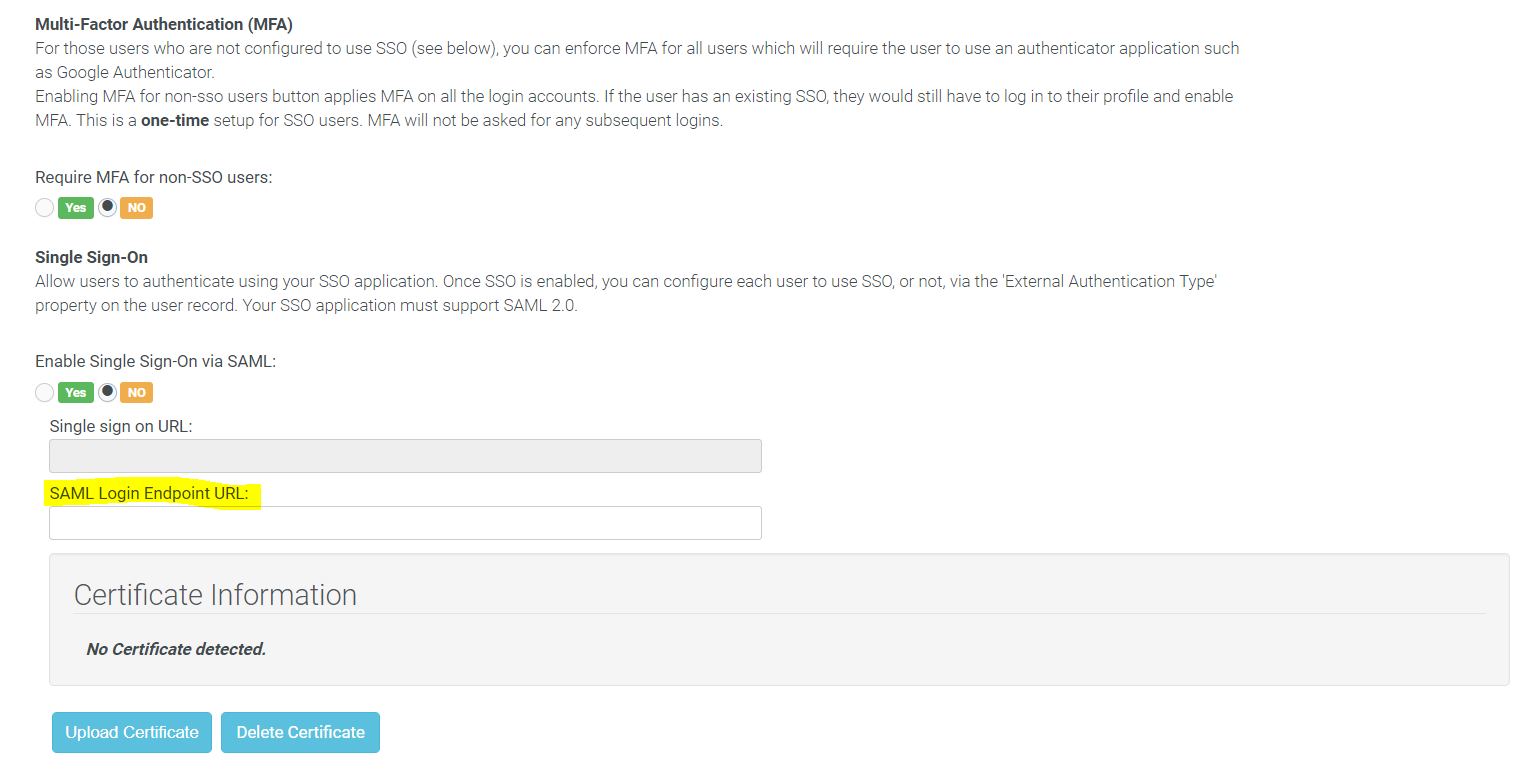
- After the DUO SAML application is created, copy the highlighted URL (Single Sign-on) from Duo and paste it in BMS by navigating to Admin > My Company > Auth & Provision > SAML Login Endpoit URL.
Duo SAML settings, attributes, and security certificate
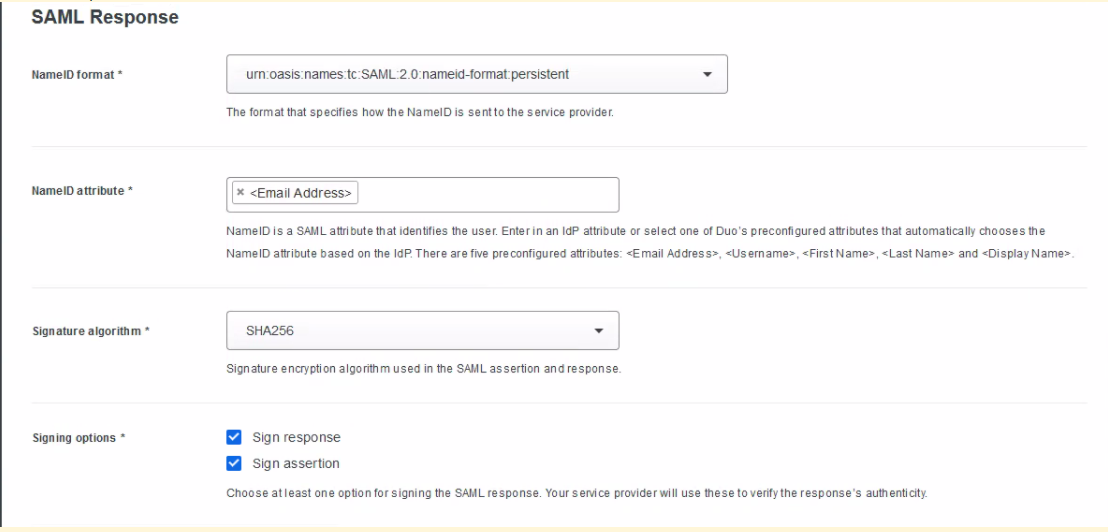
- Go back to Duo now. In the SAML Response section, enter the following:
- Name ID format: Select urn:oasis:names:tc:SAML 2.0:nameid-format:persistent from the dropdown.
- Name ID attribute: Select <Email Address>. This should appear within a box.
- Signature algorithm: Select SHA256 from the dropdown.
- Signing options: Select both the checkboxes - Sign response and Sign assertion.
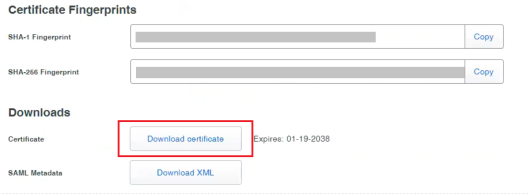
- Download the certificate.
-
IMPORTANT Go to Downloads folder. Right-click and rename the file with .cer file extension if it shows some other file extension. If you are unable to do this, double-click the file and open it. Windows will flash a warning message with two options - Open and Cancel.
- Click Open. The certificate opens with three tabs - General, Details and Certification Path.
- Go to Details tab.
- Click Copy to File open. An export wizard appears.
- Click Next.
- By default, DER encoded binary X.509 (.CER) is selected under Select the format you want to use. Select Base-64 encoded X.509 (.CER).
- Click Next.
- Click Browse.
- Select a location and provide a new filename.
- Click Save.
- Click Next.
- Click Finish. You will see a message which says, "The export was successful." If you right-click the newly named certificate file and go to its Properties, you will see Security Certificate (.Cer) next to the label Type of file. Upload this new security certificate in BMS.
- Go to BMS > Admin > My Company > Auth & Provision > Upload Certificate.
- Click Save.
- Add the following attributes:
- Map attributes section
IdP Attribute SAML Response Attribute <Email Address> email <First Name> firstname <Last Name> lastname <Username> username 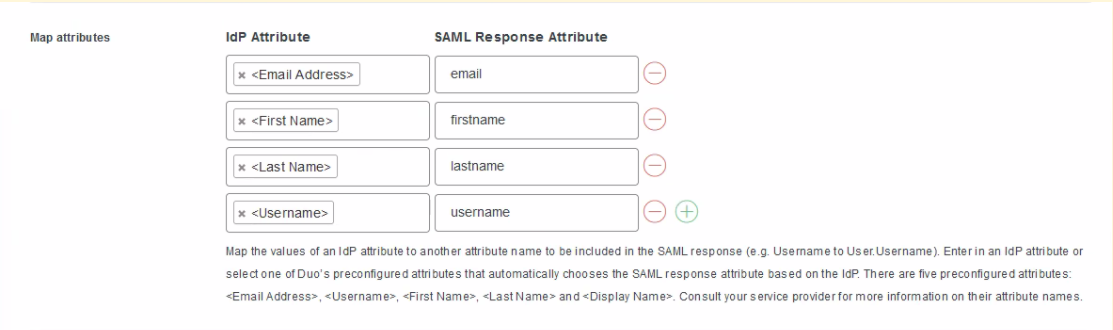
- Create attributes section
NOTE You should create a custom attribute in Duo as it is not provided by default in the application.
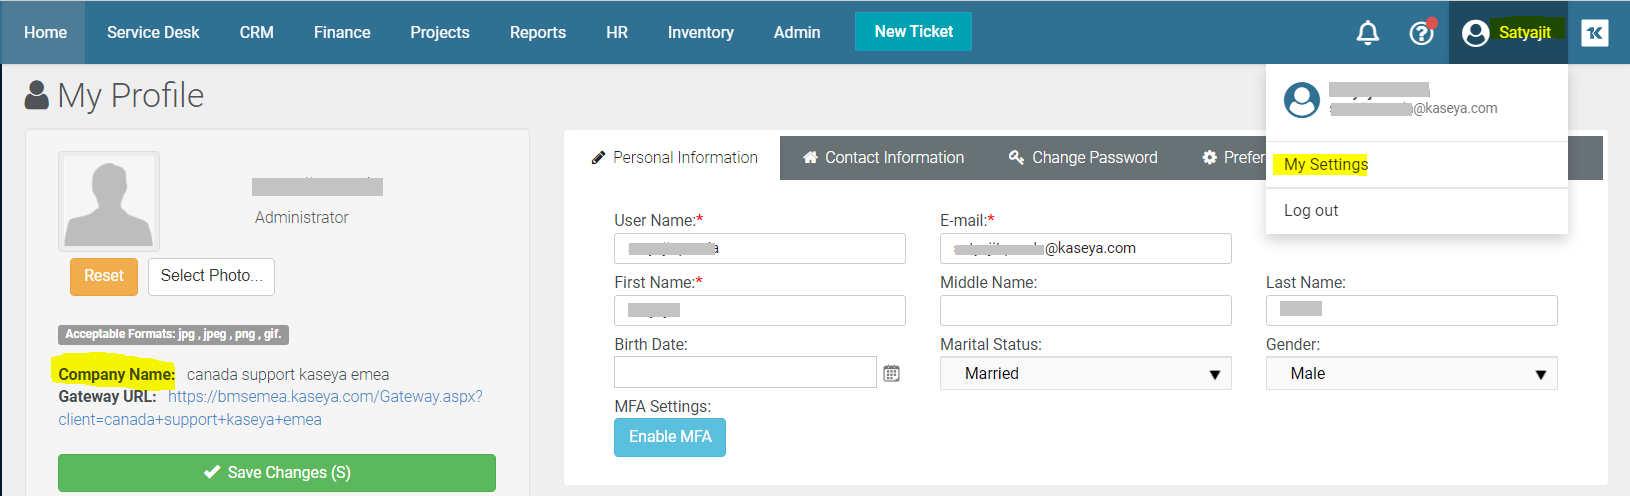
- Name: Enter CompanyName.
- Value: Enter BMS Company Name. You can find the company name by navigating to Login > Your profile name > My Settings. You will find the company name just below your profile picture.

- Map attributes section
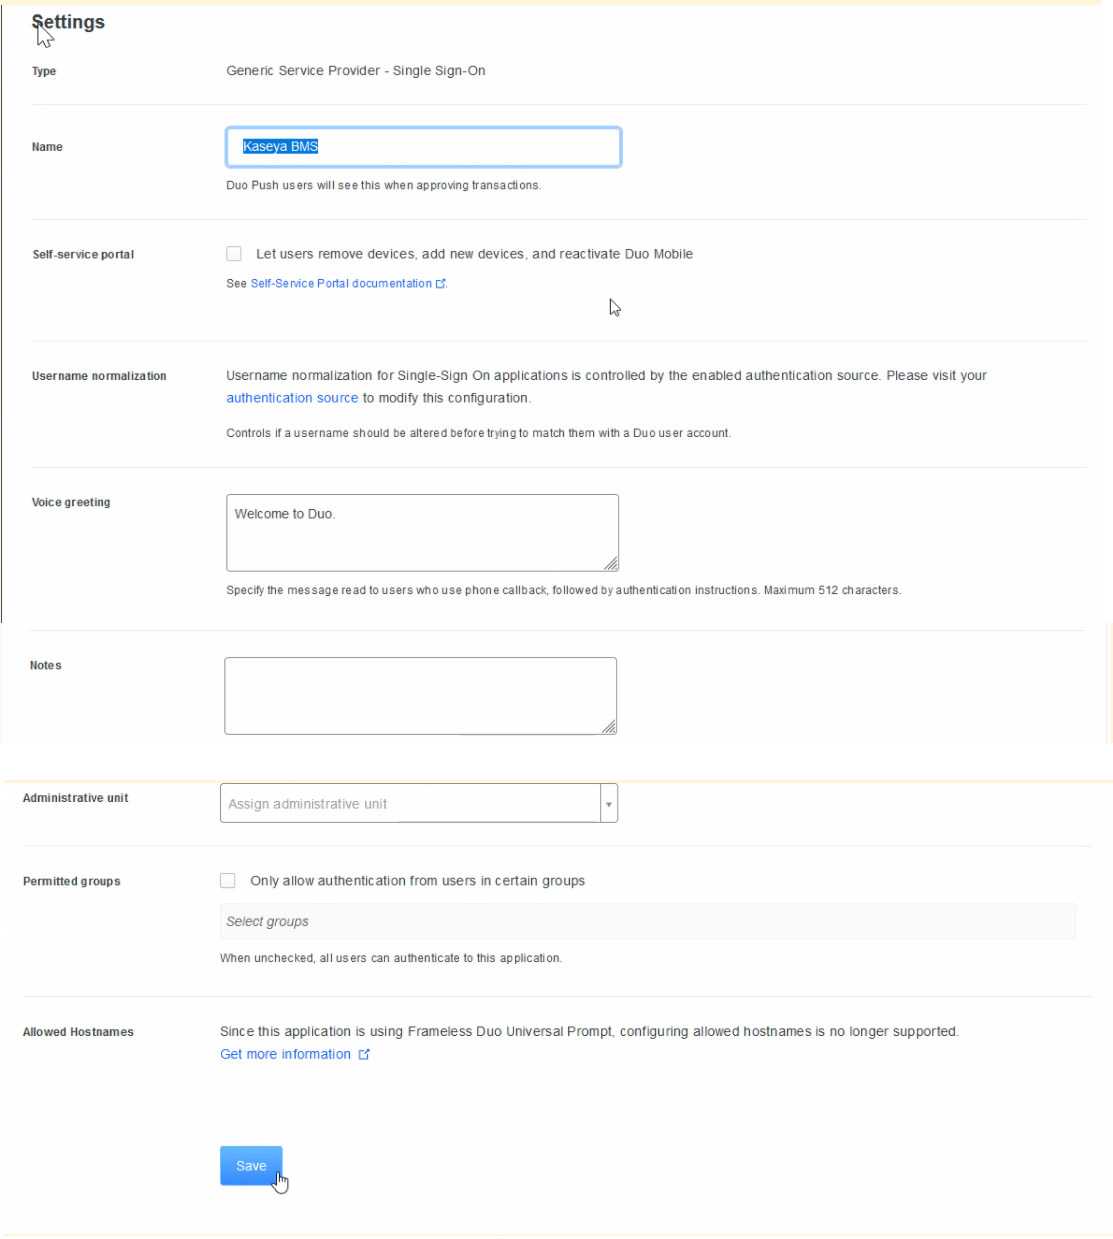
- In the Settings section, do the following:
- Name: Enter Kaseya BMS.
- Voice greeting: Enter Welcome to Duo.
- Click Save.
Sign sign-on
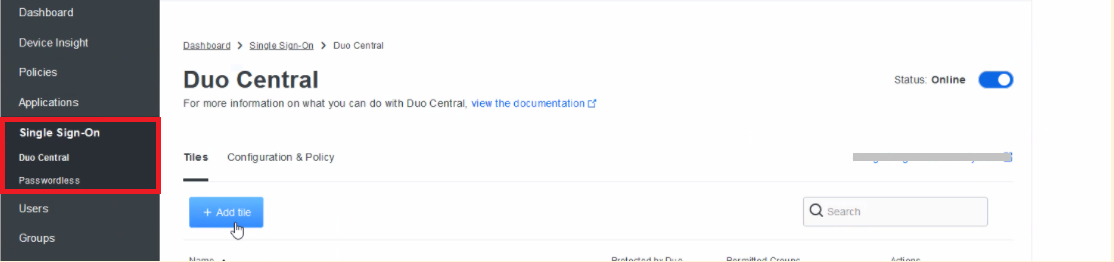
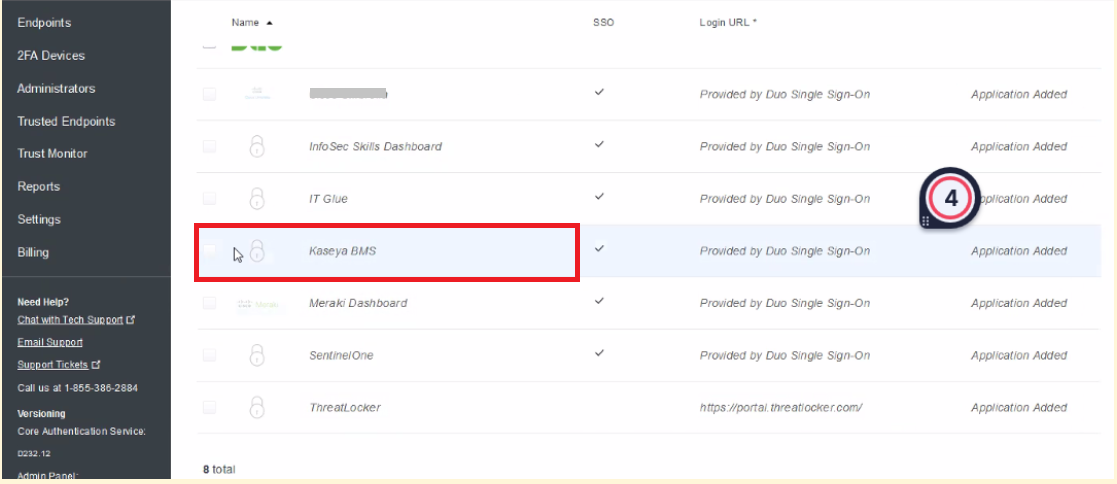
- Once the application is created, it should be added to the Duo Home screen. Go to Duo > Single Sign-on > Duo Central > Add tile.
- Next, click Add application tile. You will see a list of applications.
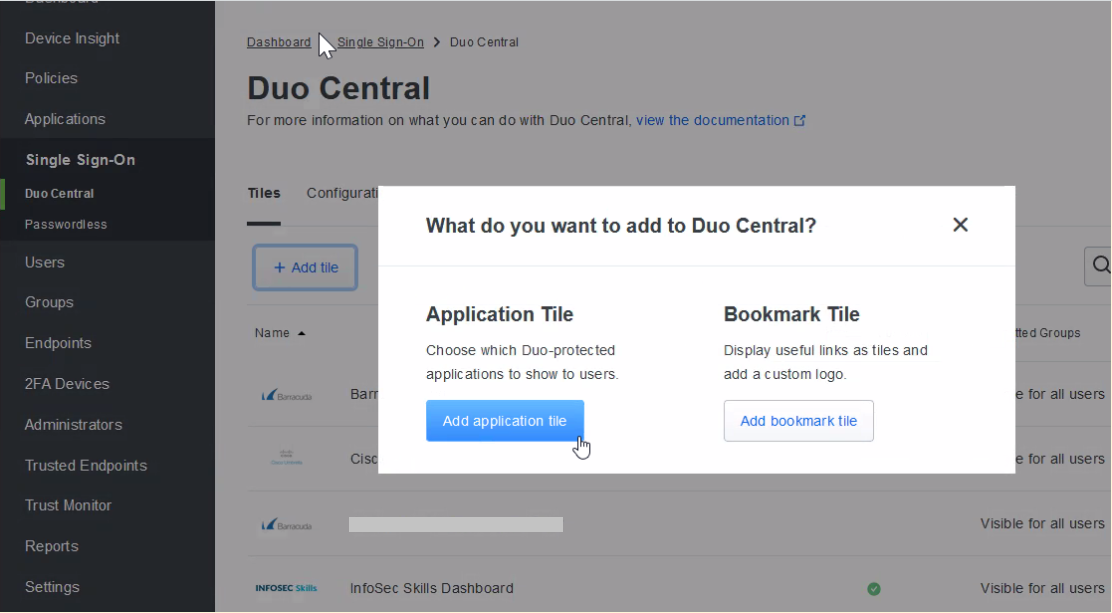
- Click Kaseya BMS. It is now added to the Duo Home screen.
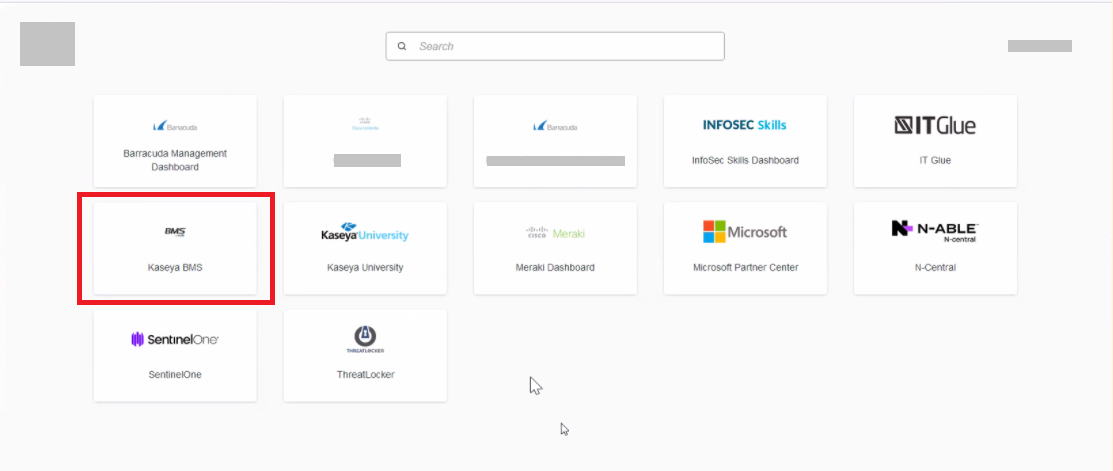
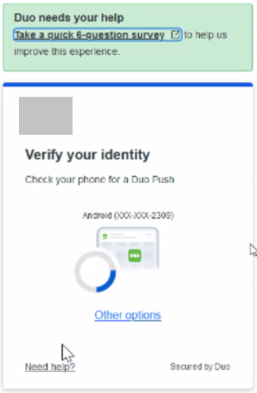
Duo authentication
Click Kaseya BMS application. It will push the Duo authentication.